The secret of making soy yogurt without store bought culture August 22, 2008
Posted by live2cook in Basics.Tags: Fresh homemade soy yogurt milk chili peppers
43 comments
I pack my homemade yogurt for lunch, daily. If I could not find time to eat it at lunch, I will have it in the commuter rail while coming back from work. A seat near the window and a cup of homemade yogurt. It feels like heaven in a train. I will forget the surroundings and think that the only thing before me is to scoop and eat the homemade perfection. I will enjoy each spoonful as if that was the final thing to taste in this world. When I reach the point where no more yogurt is left to scoop by a spoon, I end up thinking, “May be I should bring more tomorrow”.
Couple of weeks ago while I was enjoying my little cup of heaven, a passenger came and sat near me. She started watching me and I felt little uncomfortable. But continued to eat. When I finished, she asked,”Is that yogurt?”.
“Yes! homemade”, I replied.
“Wow! That’s a good amount of effort to make yogurt at home”, she replied.
“We are used to the routine. I have been making yogurt for the past 6 years in US”, I replied.
“Oh! Where did you get your culture”,she asked.
“From friends. Most of my friends make yogurt at home”, answered me.
“Wow! I wish I had some one to give me a homemade culture for Soy milk”, she said.
“You can use store bought yogurt and use a small amount as culture”, I replied eagerly.
She started to explain that her kid was diagnosed with food allergies recently. He reacted to milk and nut allergies. Even a tiny contact with these will end up in acute conditions. They are learning to find the alternatives and to read the food labels. Couple of weeks ago a store bought product generated some reactions that she is so scared to try any store bought products at least for now. Before this diagnosis the kid used to love yogurt and yogurt based products.
A question she asked influenced me to start the mission that I was talking about yesterday. “How will you make yogurt when there was no way to get a culture to start with?” was that question. I knew a very simple answer, but at the same time I didn’t know whether that would suit soy milk. I couldn’t provide her the answer that day. But, this thought was pestering me for the next few days and I decided to try the process at home. If I achieve at least a tiny bit of success, I can share that through this wonderful media, blog. It might help my friends and readers and their friends and families out there in some way.
The secret ingredient is the stem of chili peppers. If the starter went bad or if we ran out of starter, families in my home town would use the stems of chili peppers to create a new one. I have no clue which enzyme or chemical or miracle that these stems hide in them, but they seem to help. I collected some of these from the Indian green chilies that we used to buy every two weeks.
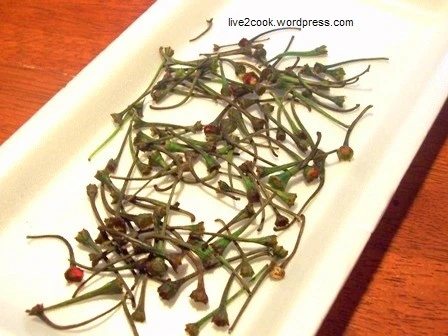
Green chili pepper stems
I used a casserole dish called “Hot Pack”, which is an insulated product similar to water coolers/warmers. We can also use ordinary mixing bowl for making the yogurt. But in our new home, the yogurt that I made in a normal bowl gave too runny yogurt. Finally after some experiments, I found this insulated casserole dish solved the problem.
The ingredients I used to make soy yogurt are
2 cups homemade soy milk
20 -25 stems of green chili peppers (Wash well in warm water)
*** In India, We don’t add sugar or salt to our milk while making yogurt.
Equipments:
1 insulated casserole dish with lid or water cooler (If using water cooler, fill the cooler with warm water and cover it until you collect other things or for 10 minutes)
1 2X2 square piece of cheese cloth
thread to tie
Method:
1. Heat the soy milk until luke warm.
2. Take the stems in the cheese cloth and tie in to a small pouch. (I left some extra thread, so that I can find the pouch the next day by pulling the thread)
3. Pour the soy milk in the insulated casserole dish. ( If using water cooler. Pour the water out before adding the soy milk)
4. Put the pouch of stems in the milk. Push the pouch to make it sink in the milk.
5. Cover with the lid.
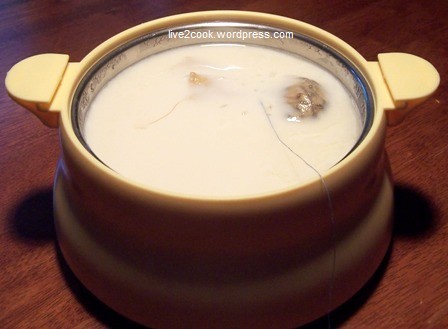
Soy yogurt set after 5 hours
The yogurt should be ready in 5 hours. The yogurt was not sour by then, so I left it for 2 more hours, until it reached my desired sourness. Discard the pouch of stems after the yogurt has been made.
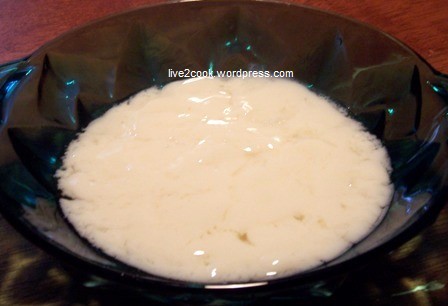
soy yogurt in a bowl
Points to share:
1. After refrigeration of the yogurt, the solids separated to the top. But the taste was good. I didn’t add any thickening agents to my first batch.
2. I used the yogurt in my muffins where they called for buttermilk. It provided the same result as dairy based products. I didn’t taste any bean end tone of soy in the muffin.
3. Adding soymilk or yogurt to pancake batter provided more fluffier pancakes. We make egg free pancakes and I could see the difference in texture while using soy milk.
If you are used to yogurt made from fat free milk, then I would say, this yogurt is a success. If you like the creamy texture of store bought yogurt, we might need to experiment with thickening agents like tapioca starch. This is going to be my next experiment using this first batch as a starter. I will post about my future trials and will link back to this post. So please stay tuned..
This is my entry for Indira’s JFI event hosted by Sia with the theme Soy and I am sending this to Susan’s “My legume love affair – second helping” event too.
 Subscribe now!
